|
Ever struggle with piles and piles of messy blankets? I think every horse person has. A blanket for each possible temperature adorn your horse's stall front. This simple way of folding blankets keeps the clutter down and hides all of those runaway straps in just a few simple steps.
#1) Hold the blanket up and meet up the edges evenly. #2) Place the blanket on the ground, again making sure the edges are close enough together. Let the straps fall away from the blanket. You don't need to worry about them at all when folding a blanket this way. #3) Then fold the blanket in half horizontally. Hot dog style if that makes more sense to you. #4) Grab the middle of the blanket with both hands and lift away from the ground. During this, the blanket straps automatically fall into place and hide themselves away enough to stay tidy! #5) Fold in half once more and you are ready to hang your blanket on the front of your horse's stall.
0 Comments
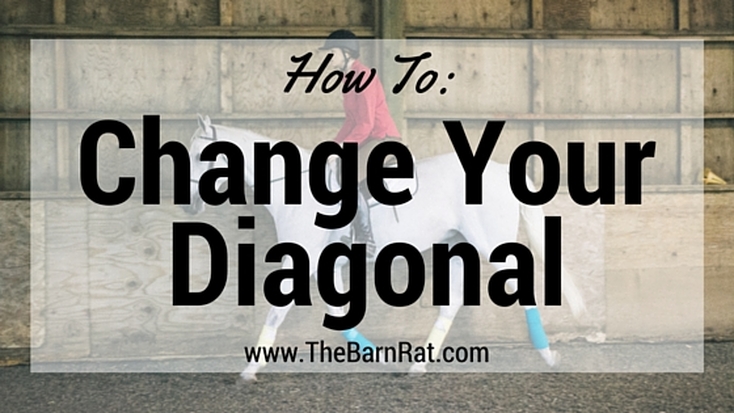 So we've learned how to know the correct diagonal, but know what do you do if you are on the wrong one to change it? There are two different ways to change your diagonal that are explained further below.
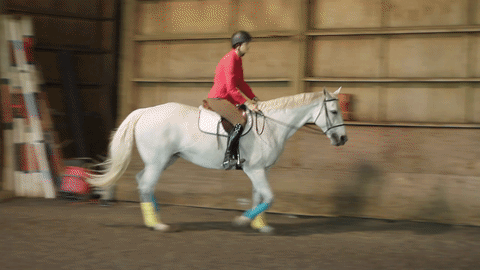
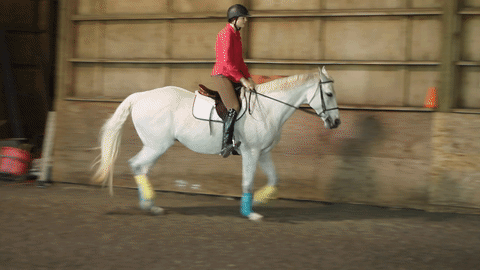
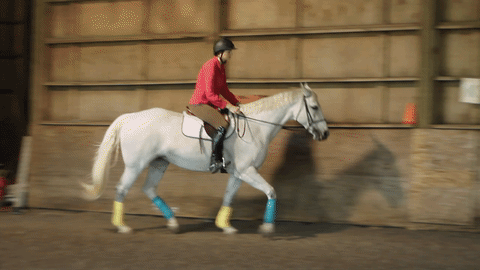
 POSTING TROT! Your trainer will shout, if you've never ridden before you might know what one of those two words mean, trot, or go faster. So now you are bouncing around as your horse trots around the ring. Then your trainer says posting is where you stand up and down out of the saddle while you trot. Ok, easy enough. Then she throws a kink in everything, she tells you that you are on the wrong diagonal. How can I be on the wrong diagonal, I thought I was going straight? What in the world is she talking about? Have they lost their mind? The main reason there is a correct and incorrect diagonal is because it helps maintain your horse's balance at the trot. So what is the correct diagonal? You want to sit when the front leg on the outside comes back. The video on the left shows when the left shoulder is coming back and the video on the right shows the rider sitting when the left leg, the outside leg, wrapped in yellow comes back.
Check back in later this week to see how to change your diagonal if you are on the incorrect one!
If you read last weeks post about the 6 Wrong Ways to Wear a Hair Net and were guilty of one of those styles then this post is for you! Wearing a professional and sleek hair net is one of those things you don't want to draw attention to. People only notice a bad looking hair net. Don't be that person.
First you will need a horse show hair net. I've tried before to buy the hair nets they sell at Walmart or Target, but those are extremely thin and useless. Spend the money and get the kind they sell at tack shops or horse shows, they are worth it! I like and use these from Dover Saddlery, and they come with a matching hair tie. It's everything you need! The hair nets come in a range of colors, so try and get the one that matches the best. I usually stick to the medium brown. Start by brushing your hair straight down and in front of your shoulders. This helps cover your ears the best. I'm not 100% sure as to why covering the ears is SO important, but it is! If you have short bangs, be sure to pin them back, trust me it's just easier than trying to wrangle them into the hair net. If you have layered hair don't worry, so do I and the hair net can handle them. Now I don't have very thick hair, but it is pretty long and I don't have any problems with it all fitting under my helmet. When you put the hair net on to begin don't worry about it coming too far down your face, we'll fix that later. First just focus on covering your ears completely with hair. I let me earlobes stay poked out so my earrings don't get caught. And this adds just a touch of sparkle that I can't help but enjoy. Pull the hair net back into the same grasp as the rest of your ponytail and use the hair tie to secure it all together. Now you can push back the hair net to be in line with your hairline. Flip upside down and pull your ponytail forward. Make sure there aren't any runaway strands. Then put on your helmet from back to front. Check the hair over your ears one last time and you are all set! 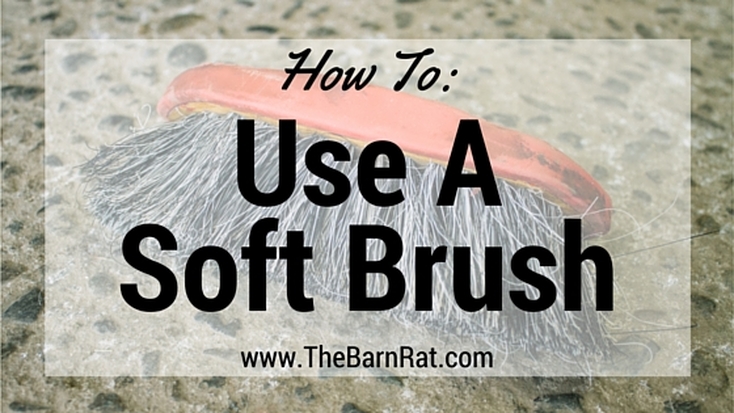 Another tool in the Essential Grooming Box is the soft brush. The soft brush is for the finishing details and for the more sensitive areas of the horse. After using the curry comb and the hard brush you can go over the whole body again and remove any lingering small dust particles. Sensitive areas would include the horse's face and the legs.
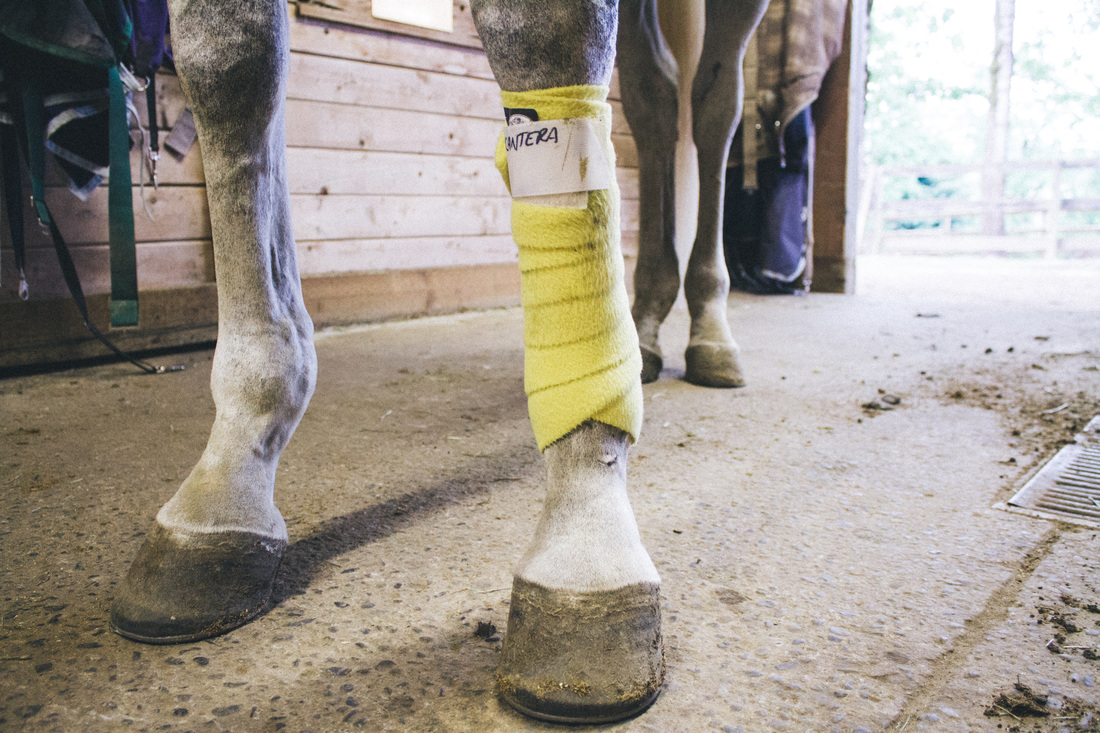
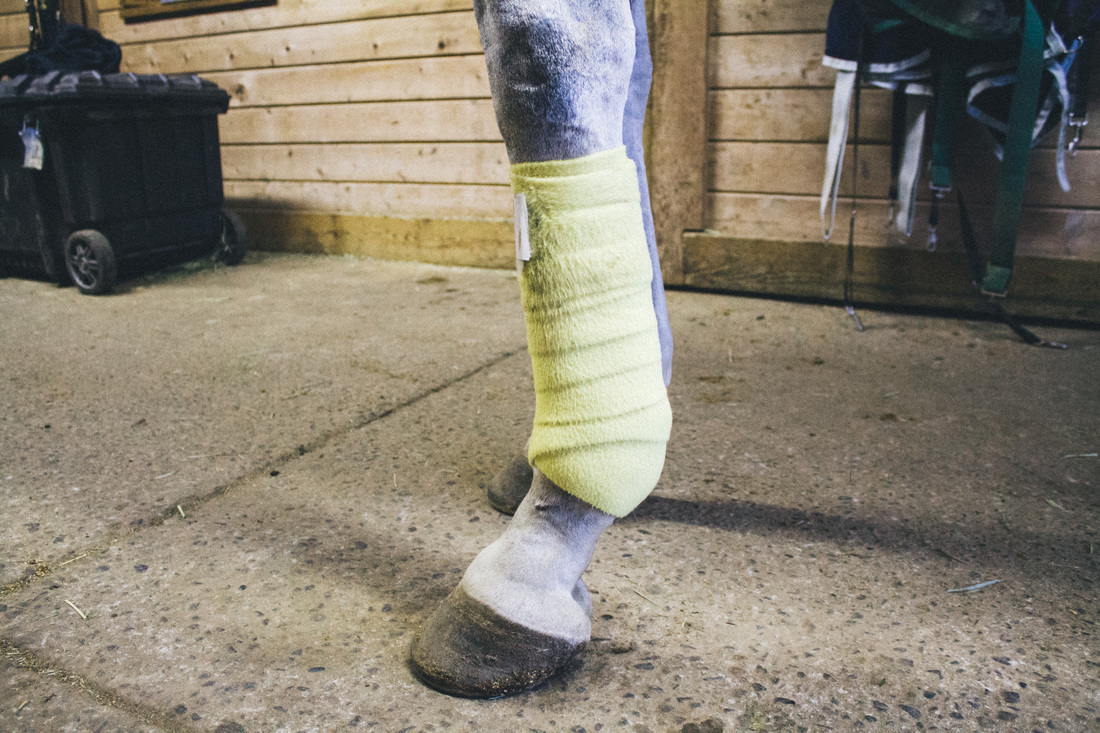
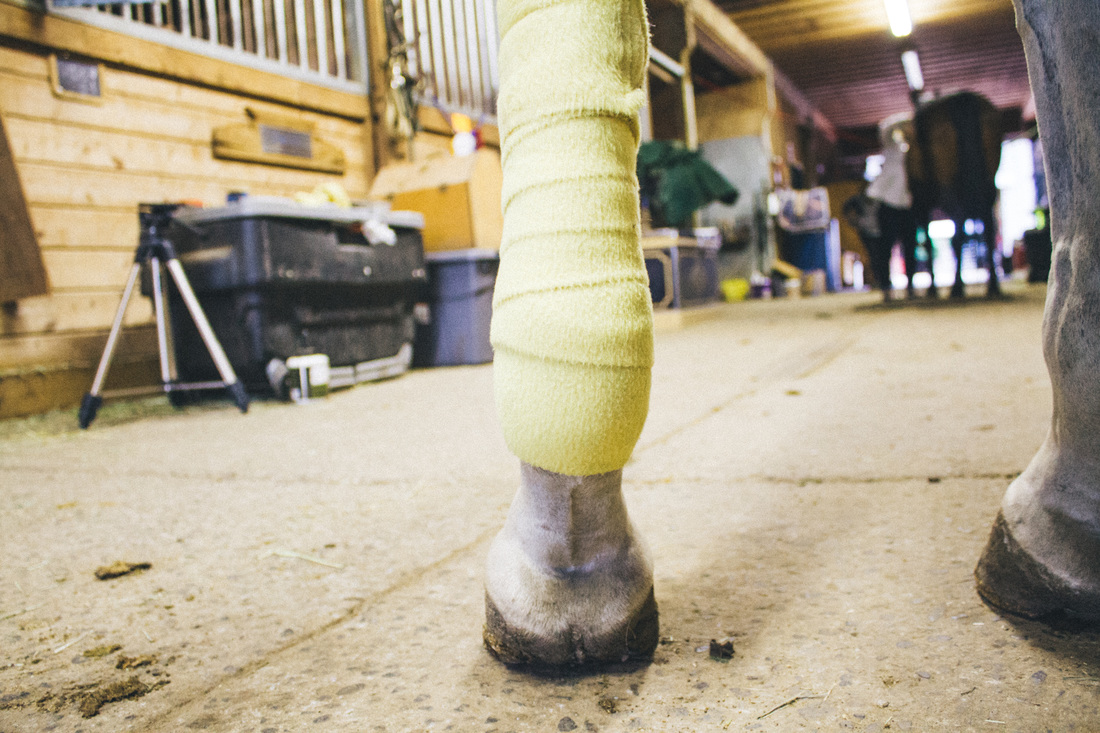
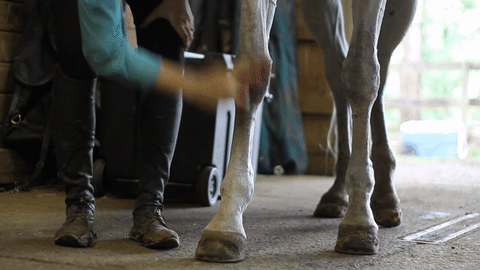
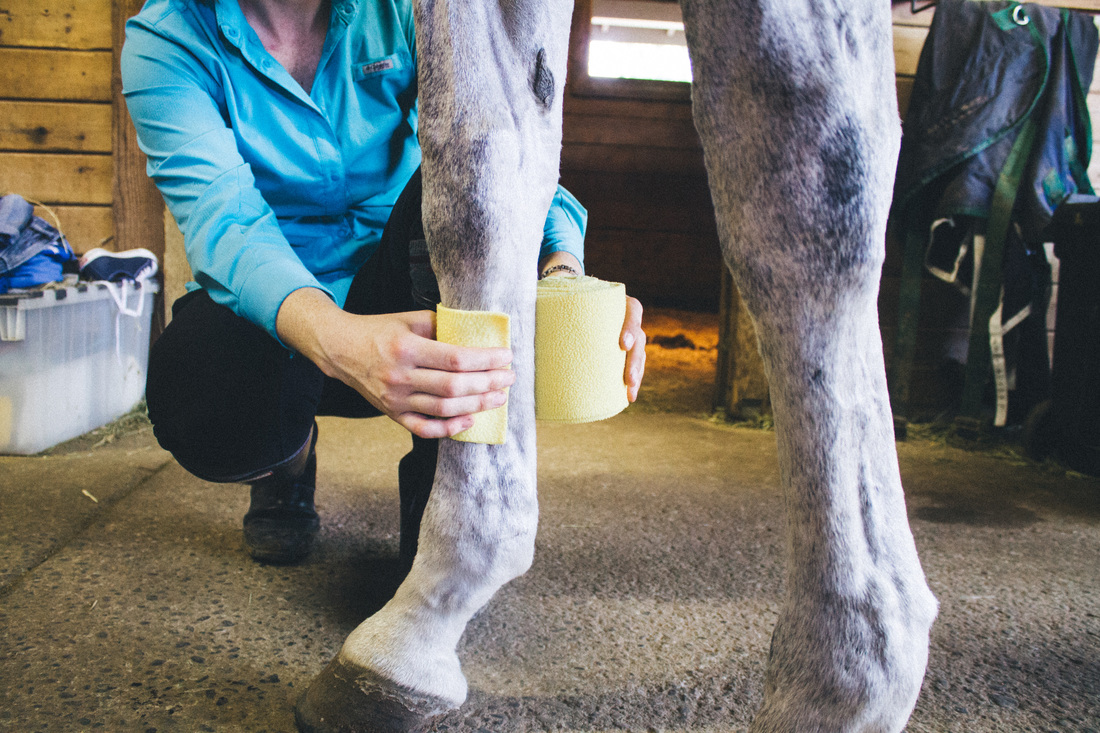
First things first, watch the video about how to roll wraps then come back here to learn how to use them. Alrighty, now that we have a safe wrap to use start with either of the ways listed below, either the H/J way or the Polo way. In this video the H/J way is demonstrated. To properly wrap and avoid injury you must ALWAYS wrap from the inside, around the front, and the towards the back. If you wrap the other way you will put a lot of strain on the tendons and ligaments on the back of the leg and can injure the horse. A bowed tendon is no fun and means time off for your horse, so be careful! Think of it this way, you are drawing a heart around their legs with the direction you wrap. The image below might explain this better. Once you have started your wrap correctly, maintain even tension throughout the entire wrap. If wrap tighter in one area and looser in another, this could cause slipping of the wrap and injury. Wrap all the way down the leg, from the base of the knee to the fetlock (ankle), when you reach the fetlock wrap around the base of the joint. This should create a criss-cross in the front and center of the leg. Then work your way back up the leg and finish at the base of the knee. Make sure the velcro is secure at the top to prevent the wrap from coming off. Ideally, your wrap will have even spacing all the way down and back up. If you start working your way back up and run out of wrap do not just dramatically increase the spacing or secure the velcro in the middle of the leg. These are both great ways to cause injury, so unfortunately you should remove the wrap, re-roll it, and start over. Why do we use Polo Wraps? For support. Think of polo wraps as an ankle brace or knee brace you might wear when exercising or playing a sport. The wrap provides support to a sensitive area of the horse helping to prevent injury. A polo wrap is the most supportive leg protection for the tendons and ligaments. Boots can also be used for protection, but often they don't offer as much support. However, hard sided boots are better protection from the back legs accidentally kicking the front legs. Always, talk to your trainer about what boots are the best for your horse. Each horse has different needs and trainers have their own preferences. Any questions? Feel free to leave it in the comments and I will be sure to answer them for you! 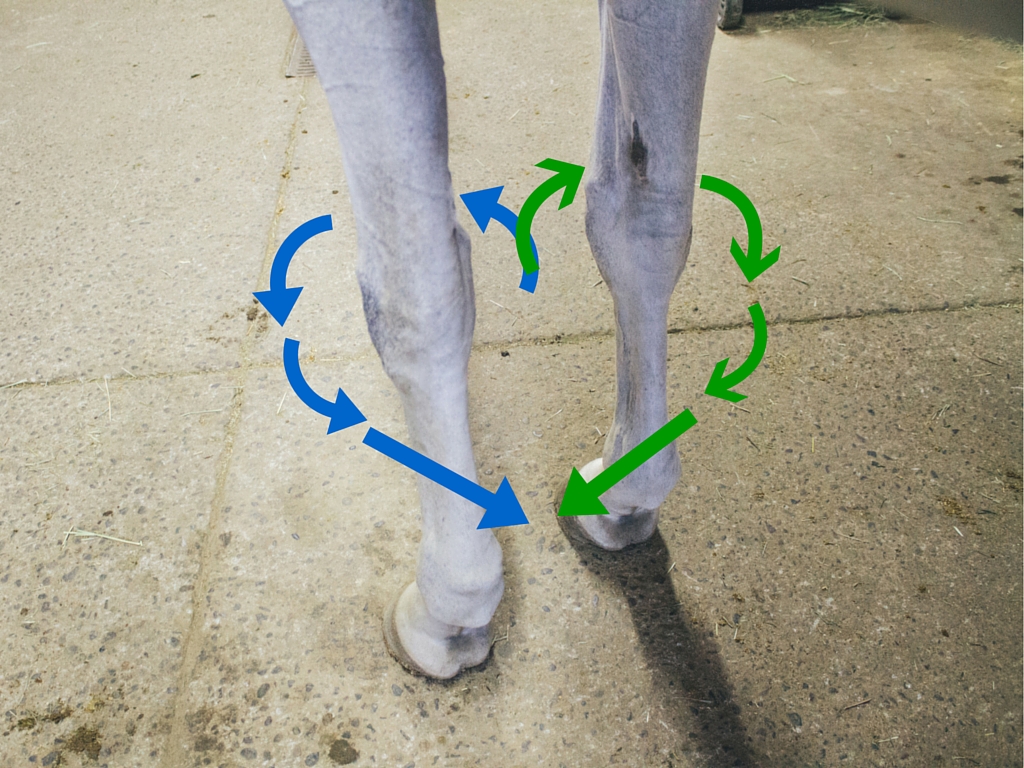
    The hard brush is another item from The Essential Grooming Box. It should have long course bristles. Use the hard brush after currying your horse's body. Brush the neck and body with short strokes. This helps remove excess hair and dirt from the horse. Be gentile with this brush, since the bristles are firm you can irritate sensitive areas if used too firmly (ie. the back and flank). Do not use on the face or legs. 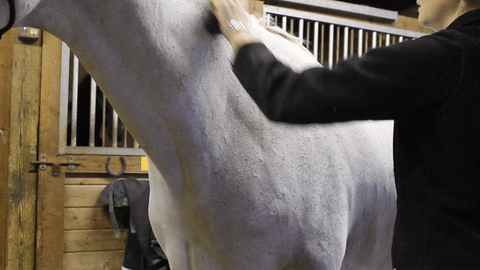 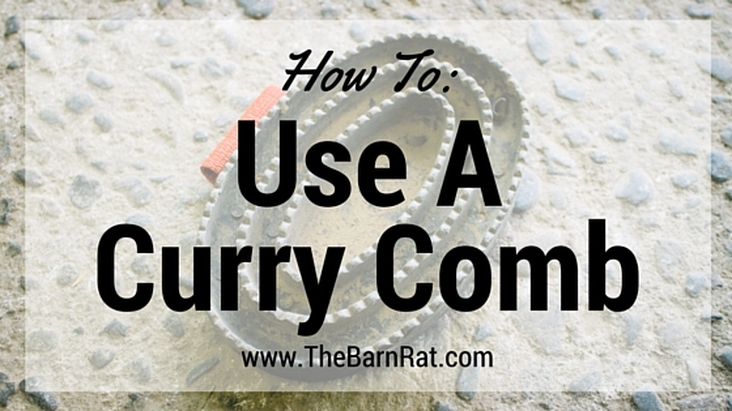 As mentioned in the previous post, The Essential Grooming Box, the curry comb is usually made of rubber or plastic with bumps or nobs covering the useable surface. The curry comb is best used as the first tool when grooming your horse. It lifts dirt and hair away from a horse's skin to be easily brushed away later. Currying also stimulates a horse's circulatory system and is a way to bond with your horse. Use the curry in a circular motion all over the neck and body. Do not use on a horse's face or legs, those areas are very sensitive. 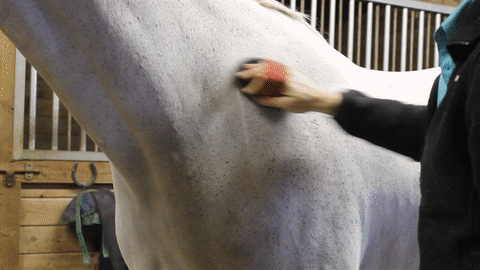 Rolling polo wraps might not seem like something that should require a full on video to explain. But, here's the thing. If you roll up your wraps like this you eliminate a couple of things. First, confusion. Sometimes wraps look bigger when wrapped loosely and will trick someone into thinking they will fit a bigger area than they really will. That's just annoying. Second, you eliminate mess. I hate it when I drop a wrap and because the ends weren't tucked in it unrolls down the whole barn aisle. No one wants more work, and have to re-roll a wrap. And finally, injury. When a wrap is, again, rolled loosely you then have to pull it tighter as you wrap it around the leg. This is commonly done with inconsistent pressure and then can cause the horse to pull a tendon or ligament resulting in lameness, time off and possibly something more serious. Don't take that risk. It's simple, just roll a good wrap to start and you (or whoever ends up using the wrap) won't have any issues.
A shiny, silky tail is always envied. But, unless done properly brushing a tail can rip out the hairs causing thinning and irritation to the horse. So, in order to keep your horse's tail thick and beautiful follow these steps and you'll be sure to wow the crowd! Step #1: Generously and thoroughly spray the tail with ShowSheen. ShowSheen is a favorite product for detangling and increasing shine. Step #2: Using a wide tooth comb, begin to brush. A wide tooth comb is part of The Essential Grooming Box. NEVER use a hairbrush with close together bristles! These brushes rip out tail hair sooo easily. Step #3: Begin at the bottom and slowly work your way up. Step #4: Always use your non brushing hand to hold the tail. This helps prevent hair loss and irritating the horse by pulling on their tail. Step #5: Stay patient. You may need to brush the same area multiple times to remove all the knots. Step #6: When you are finished you should be able to run your fingers through the tail with minimal knotting. 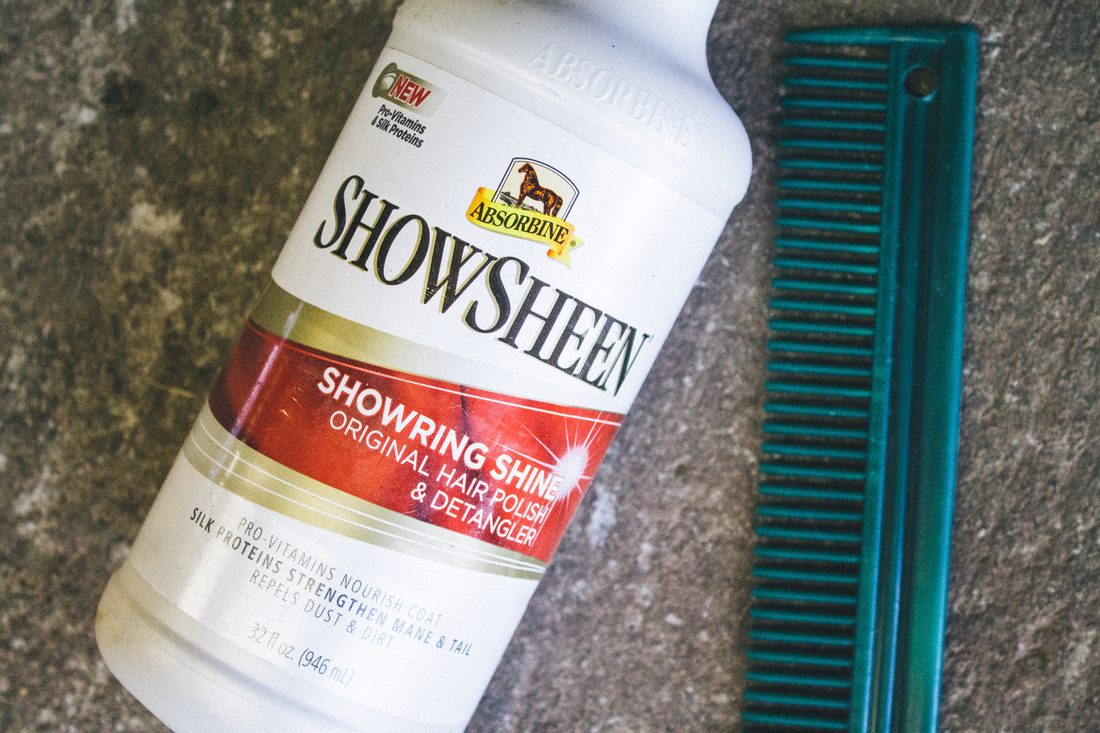 |
Categories
All
Sponsors
Cantera Equestrian

Trafalgar Square Books
Interested in sponsoring The Barn Rat? Be sure to contact us here!
|

© COPYRIGHT 2022. ALL RIGHTS RESERVED.