THE BARN RAT
  • Learning Center
    • Anatomy
    • Barn Tours
    • Culture
    • Equipment
    • Grooming
    • Product Reviews
    • Riding
    • Transformations
    • Videos
  • Career Center
    • Farrier School
    • Vet School
  • Book Club
  • Library
    • Magazines
    • Movies
  • Blog
  • Shop
  • Learning Center
    • Anatomy
    • Barn Tours
    • Culture
    • Equipment
    • Grooming
    • Product Reviews
    • Riding
    • Transformations
    • Videos
  • Career Center
    • Farrier School
    • Vet School
  • Book Club
  • Library
    • Magazines
    • Movies
  • Blog
  • Shop

About: Types of Restraints

1/8/2018

2 Comments

 
Picture
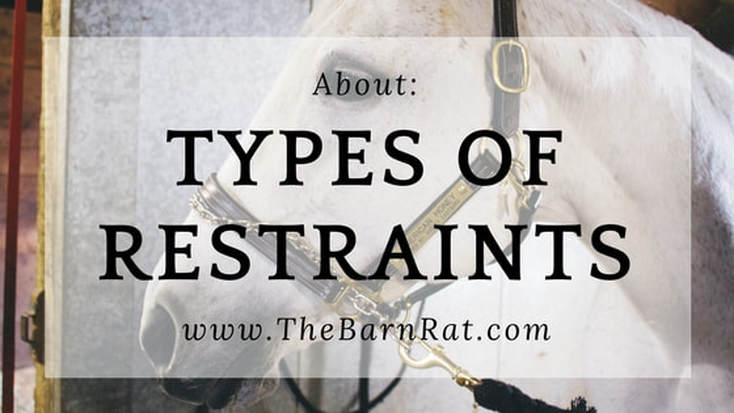
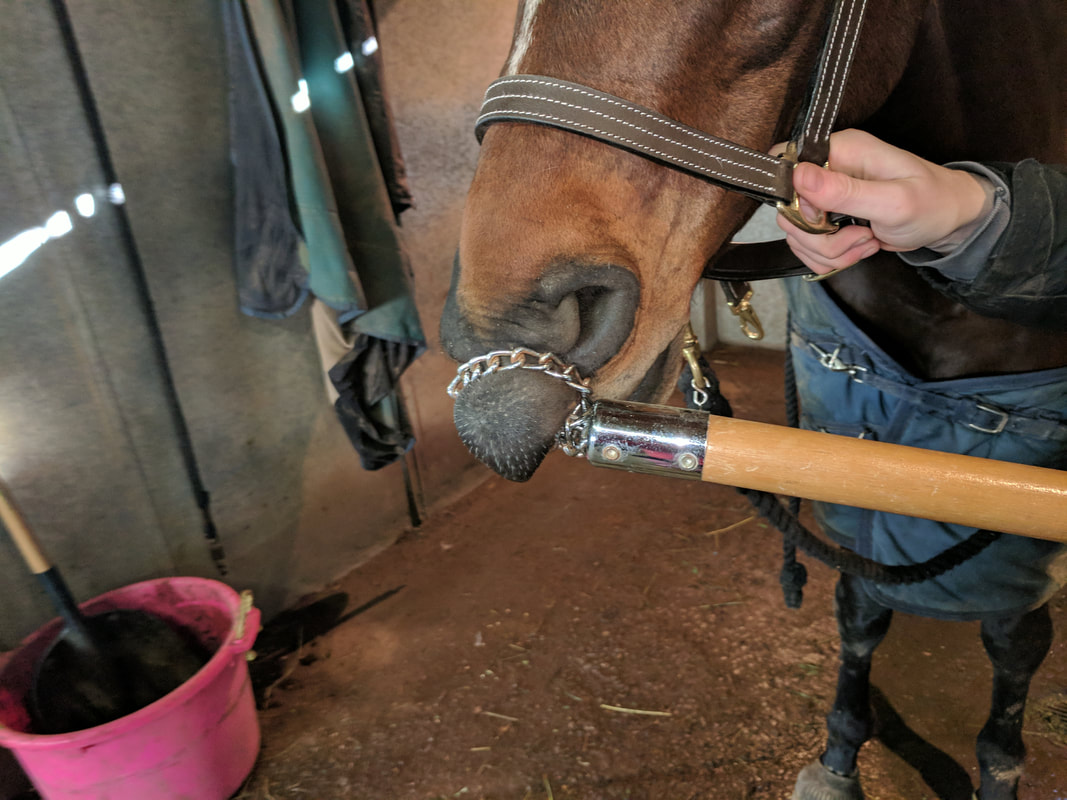
   Daily we handle our horses. Grooming them, riding them and loving on them. Sometimes, we need to do something with our horses that they aren't particularly fond of, like clipping, delivering medication, or leading them on a windy day. When those situations occur using a restraint technique can ensure both yours and your horse's safety. Below are an overview of the most common restraints. These restraints can very in severity and are to be used with caution and understanding. Being too firm with your horse can cause them to fear you and the situation, which no one wants. If you are wanting to practice any of these techniques look to your instructor or barn manager for assistance. 

Picture

Chain Over the Nose

   This is a common way to restrain a horse. You can use this technique when handling the horse for the vet or when leading your horse around when they are feeling fresh. Yanking on the lead rope when you have a chain can be very severe and hurt your horse's delicate nose bone, so be careful.

Lip Chain

   A lip chain can be a difficult restraint for your horse to accept, it is an unique place for your horse to feel an object. The pressure of the chain affects both the gums and the underside of the upper lip. This pressure should be gradual and steady, DO NOT yank on the lead rope! Otherwise you can cause the horse severe pain and bleeding. 
Picture

Picture

Lip Twitch

   There are three different kinds of lip twitches. The chain one you see to the left, a rope twitch and a homemade bailing twine twitch. The chain is the safest to use because the chain links will only twist so tightly together. With a rope or twine it is easy to twist too tightly and cause your horse to lose circulation if left on for too long. 

Skin Twitch

   A skin twitch is a simple distraction technique to get your horse's attention on something else besides what you are trying to accomplish. Depending on your hand strength this is a safe restraint that is difficult to overdo.
Picture

Picture

Ear Twitch

   Some horses can be sensitive with their ears so using an ear twitch requires you to be aware of your horse's feelings. The last thing you would want to do is create ear issues with a horse that didn't have them before. This technique is commonly used when clipping their ears and bridle path since you need to work in that area.

Picking Up a Leg

   This is the easiest and least intrusive restraint. If you are needing to work on a certain leg and they won't stand still, having someone simply pick up the opposite leg can allow you to finish your task.
Picture

Chemical

   There are many many different chemical drugs that can be used in a wide variety of situations. Determining what is the best to use in a particular situation is best left to your experienced barn manager or trainer. Administering a drug incorrectly can cause extreme repercussions that can be detrimental to your horse's health.
2 Comments

2017 Christmas Wish List

12/11/2017

0 Comments

 
Picture
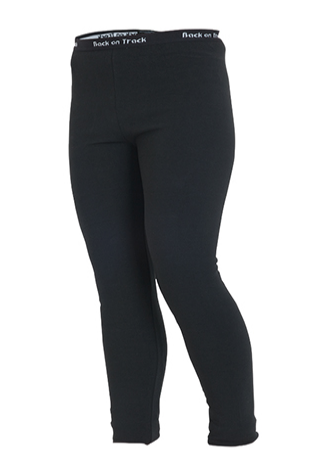
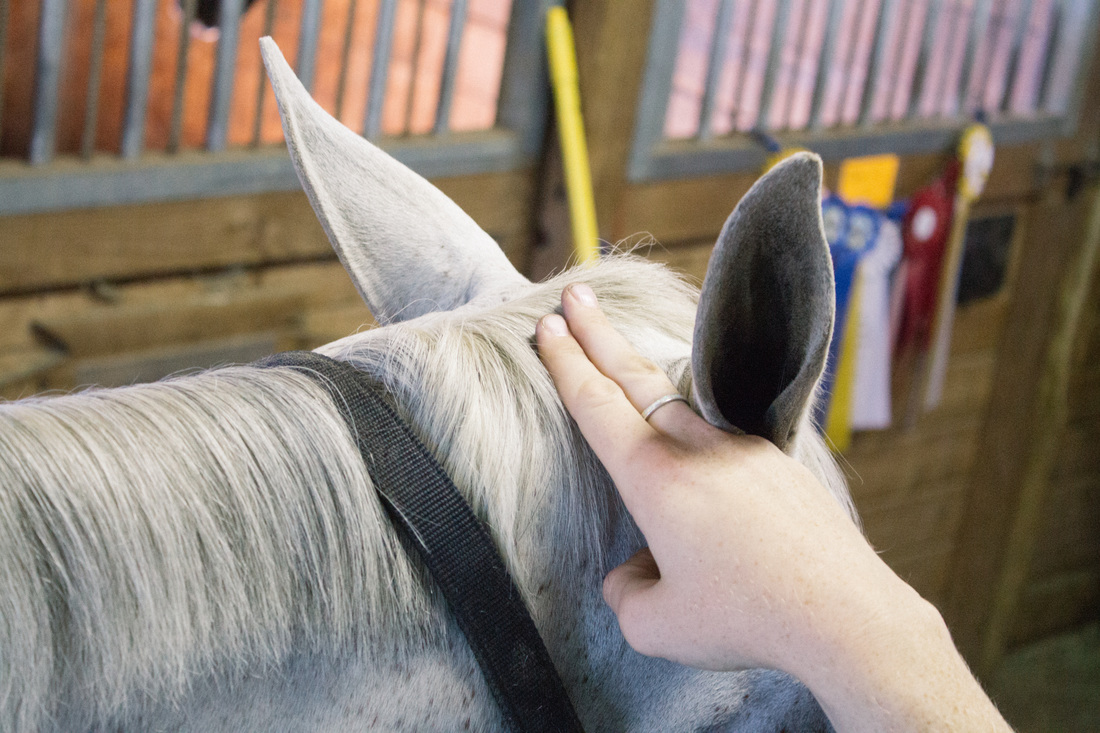
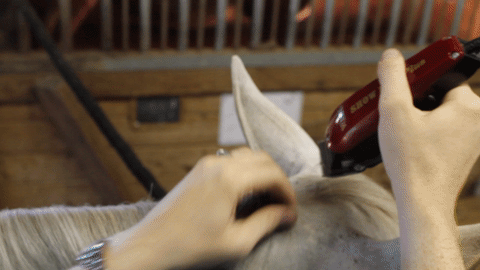
   Christmas is right around the corner and if you are wondering what to get the horse lover in your life consider a few items from my personal Christmas wish list below. There are many other things to get your rider friend other than anything with a horse on it. 

Picture
Mae & Lort Ring Backpack
Picture
ManeJane Spur Straps
Picture
TKEQ Shop T-Shirt
Picture
George Morris Book Set
Picture
Shop Hunt Club Derby Belt
Picture
Custom Fluff Monkey
Picture
Back on Track Leggings
0 Comments

How To: Clip the Ears & Whiskers

10/13/2016

0 Comments

 
Picture
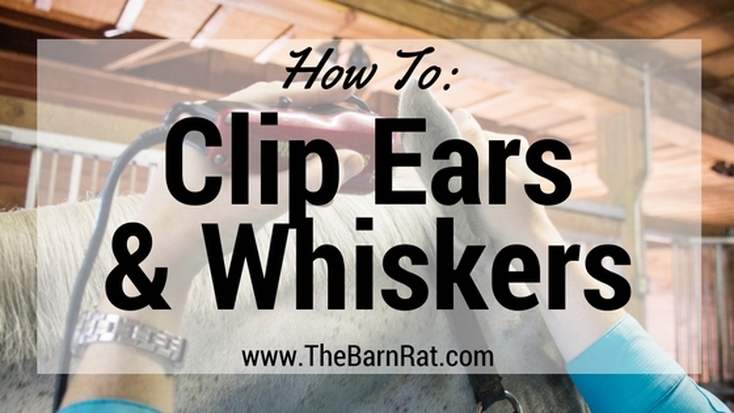
   Clipping the ears and whiskers are the simplest forms of clipping that can really make your horse look sharp and show ready. Also, have clipped ears helps a horse be more accepting of earplugs because the hair isn't irritating. There are many different types of clippers that you could use for this. I recommend a pair of clippers meant for horses! These clippers have removable blades that allow for fresh new blades that offer a smoother shave and also allow the blades to be sharpened. A good starter set of clippers are the Andis or an advanced set that I love are the Wahl clippers.

Ears

   Clipping ears can be done one of two ways. You can either trim just the edges and hair that sticks outside of the ear, or you can remove everything from the inside of the ear as well. Normally, for horse shows you would clip out all of the hair. This just looks the sharpest, as you can see in the image below. To do this you want to use a #30 blade. This length is WAY too short to use anywhere else on your horse!
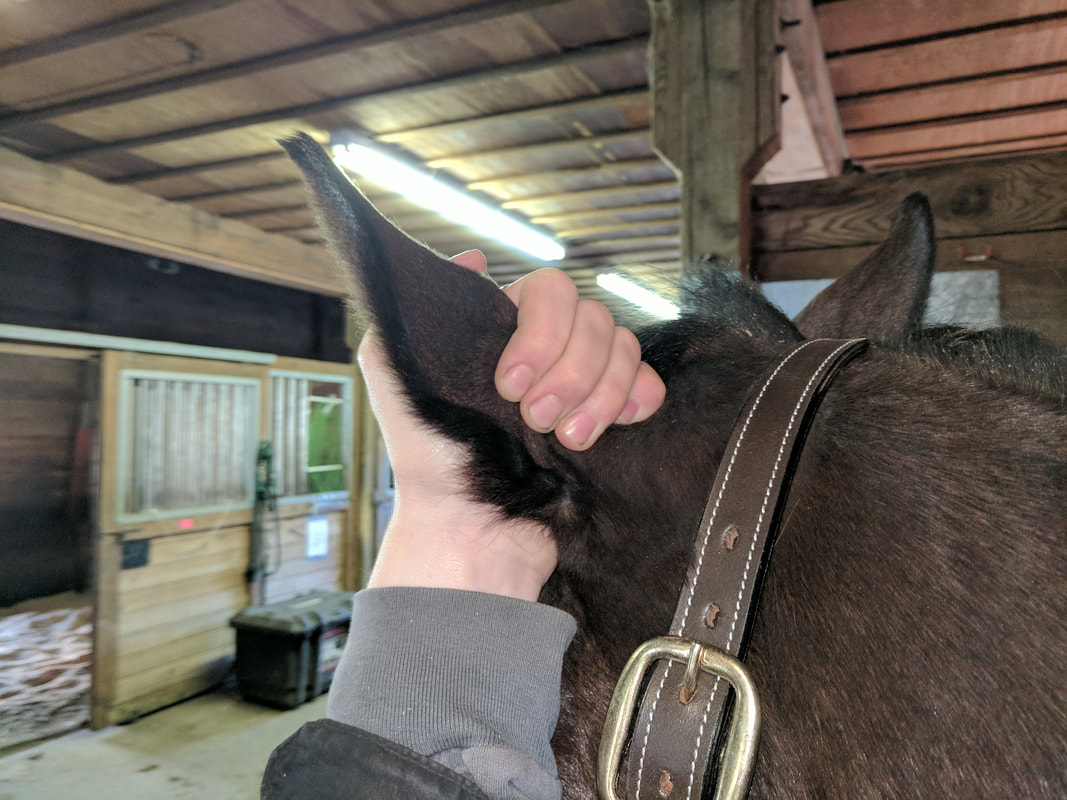
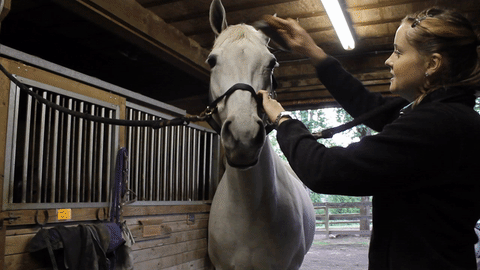
   Trimming the ears can be disliked by many horses. It is important that you move slowly, gently and take your time. However, you also need to stay determined and wait your horse out if they object. Once they realize you aren't going to hurt them most horses give in and let you clip their ears without argument. Sometimes a horse can have had a bad experience that you are unaware of that will make clipping their ears a real struggle. This is definitely where patience and fairness come in to play. Never get frustrated with your horse and act out emotionally. This will only make them afraid and tell them that clipping is a bad thing. In the video watch how gently I handle my horse's ears. And like with anything for horses, the more you do it the more they get better at accepting what you are doing. 
Picture

Whiskers

   Clipping whiskers is probably the easiest thing to clip and the most accepted area by horses. Make sure you are using the same #30 blades you used to trim up the ears. Again, this length of blade should only ever be used on the ears and whiskers! It is way too short for the whole body.
   When clipping the nose, make sure to clip under the bottom lip and the insides of the nostrils. There also can be some long stray hairs that go pretty high up the nose. Getting all of these little hairs helps your horse look their best. Even though most horses are well behaved for getting their whiskers trimmed I will always use my non clipping hand to hold on to their halter to help steady any sudden movements.
0 Comments

How To: Trim a Mane

9/16/2016

1 Comment

 
Picture
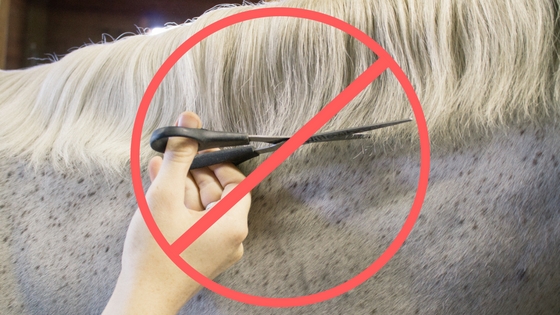
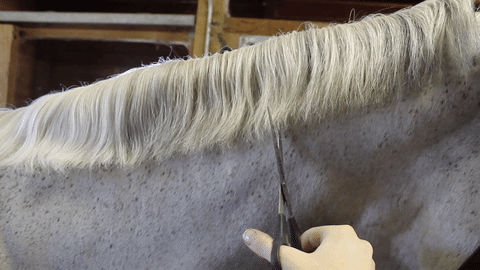
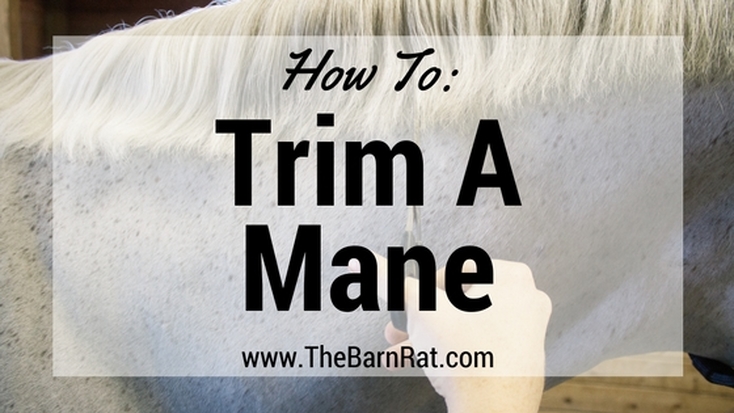
   So, last week we learned how to pull a mane. And while I will always say to do this first and get as far as you can. Sometimes cutting the mane is just the way things need to go. There are a few instances where cutting the mane is the better option. The first, if you are trimming the mane of a jumper. Jumper manes are typically longer and they want a more straight across look to them. Another reason to pick up the scissors is if your horse already has a really thin mane and pulling out any hair would leave them bald. No one likes that look so cutting the mane is the obvious choice. The third reason would be if your horse is totally throwing a giant temper tantrum about you pulling their mane and restraining them is no longer an option. Depending on how important them behaving for mane pulling is, you could give them a sedative to help calm them down. Using a sedative though requires professional help and you should always ask your trainer to administer the drug at the correct dosage. 
Picture
   So, for any of the reasons listed above you've decided to cut your horse's mane. Never, I repeat NEVER cut your horse's mane with the scissors parallel to the mane. Cutting like this will result in a very choppy and uneven mane that when you try and fix it will just end up getting shorter and shorter. Also, for safety if your horse were to suddenly move you could end up stabbing them.
   The correct way to hold the scissors would perpendicular to the mane. You want to cut up into the mane instead of across it. This way, as you can see in the clip on the side, if the horse is to shake their head or move you can safely bring your hand away from the horse. 

   Cutting up into the mane also creates a more natural look to the end result. And because you aren't cutting straight across it also thins the mane a tiny bit letting the mane lay on the horse's neck in a more relaxed way.
Picture
Picture
   To the left you can see an example of a jumper mane that has been cut. If you are trimming a hunter mane you will still want the length to be the same as discussed in the pulling post. 

   If you have any questions please feel free to reach out and contact me or leave a comment!
1 Comment

How To: Clip the Bridle Path

9/13/2016

3 Comments

 
Picture
Picture
   What is a bridle path? Well, it's exactly what it sounds like, a path for the bridle. Clipping this area just helps keep your horse looking sharp and allows your bridle to fit neatly on your horse. 

   To determine where your bridle path should be, start directly behind your horse's ears. Don't be fooled by where your horse's halter sits and think that's where your bridle path should be. It's called a bridle path because you are supposed to measure where the bridle would be. 
   So, start behind the ears and then use two fingers to estimate how long your bridle path should be. You really only want it be big enough for the headstall of the bridle. 

   Unless you are way taller than the horse you will be clipping grab a stool. Clipping the bridle path is not something that your horse should be resistant to but just in case, you don't want to be in the middle of a clipping pass to have your horse lift their head up on you. Goodbye forelock!
Picture
Picture
   If your horse's old bridle path is waaaaayyy too long, like 5 fingers instead of 2, that has started to grow out, don't just reclip everything because that's what was done before. Endure the mohawk for a little while and let that hair grow out.

   As always if you have any questions feel free to contact me or leave a comment!
3 Comments

How To: Use a Hoof Pick

9/9/2016

2 Comments

 
Picture
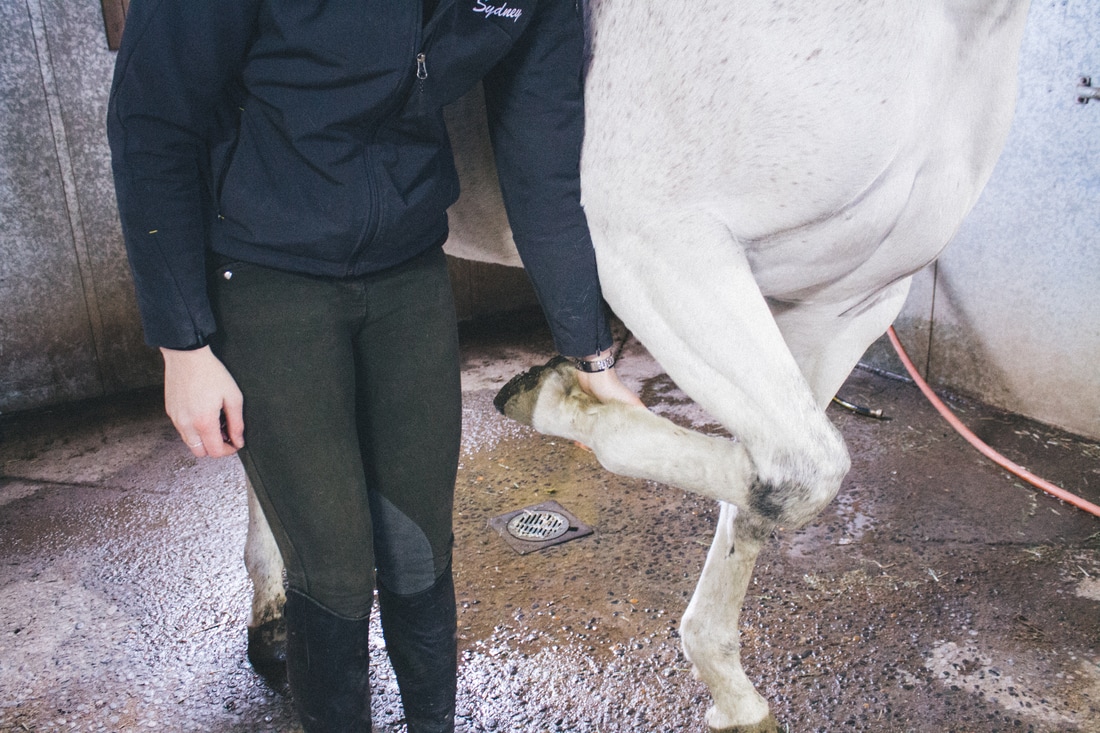
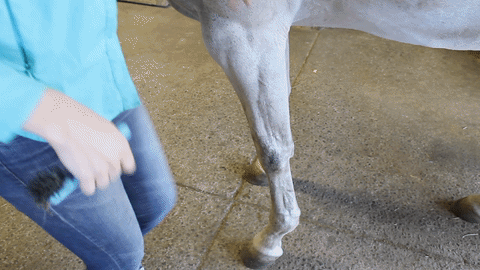
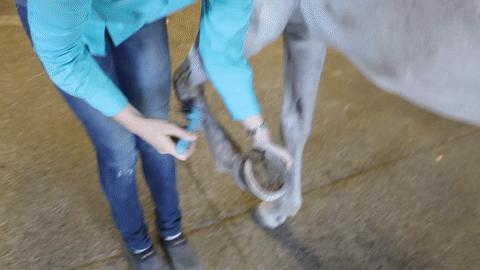
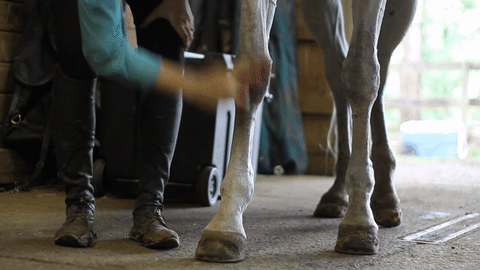
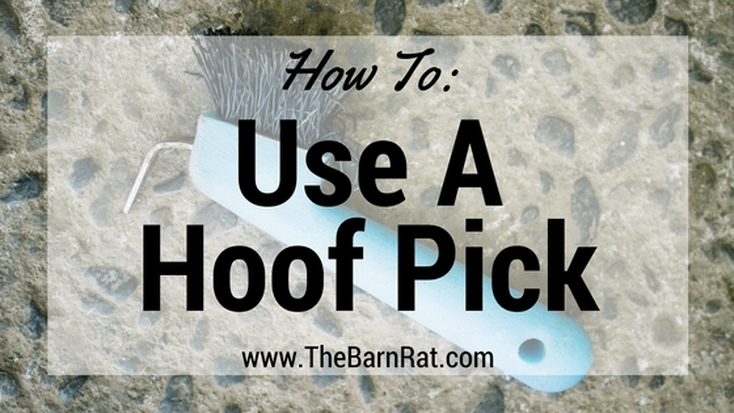
   This is the last installment on how to use each item in The Essential Grooming Box. And, honestly, it's probably the most important. Cleaning out your horse's feet before each ride is crucial to making sure your horse stays healthy and sound. Many times rocks will get stuck under their shoes and will cause a lot of pain, lameness and potentially a serious issue that requires time off. In order to avoid that, get to know your horses feet and pick them out regularly.

Picking Up the Foot

   Before we can remove any dirt and debris from our horse's shoes we need to be able to handle their feet. Start by facing your horse's tail and stand right next to their body. This will work the same for front and back legs. A well trained horse will react to a gentle touch, but some are more stubborn and require a little convincing. 
Picture
   Start by running your hand down their leg. Give their tendons a gentle squeeze and your horse should understand what you are asking and pick up their leg for you. If they don't understand or if they are just refusing to listen, you can push your hip into their shoulder or hip while still squeezing their tendons. This will push your horse's weight off the leg you are trying to pick up and make it easier for you to lift the leg.

Picture

Picking the Hoof

   I like to hold the hoof pick with the handle filling the palm of my hand and the pick towards my body. This way, when I go to pick the dirt from my horse's hoof, I am picking away from my body and don't accidentally shower myself with whatever my horse decided to step in that day.
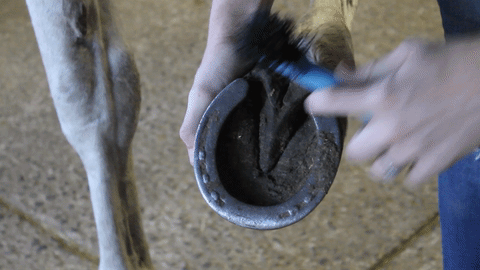
   Depending on how dirty your horse's feet are depends on how much work is needed to get a clean hoof. A general rule though is to start by finding the V of the frog. Yes, I know that didn't sound like a real sentence, I will put together a horse anatomy post soon! Anyway, you can really see what I am referencing in the bottom gif. Be gentle as you pick around the frog! That part is like the sensitive part under your fingernails and it would really hurt if you dug too deep. After you find the frog I like to work around the edges of the shoe. This way you can remove the big clumps with minimal effort. Once you've knocked the big stuff loose, I will flip my hoof pick over and use the bristled side to brush out the debris. By using the brush I am confident I won't hurt my horse's hoof on accident.

A Closer Look

  Here is a closer look at how I pick my horse's feet. Magically, they were super clean when I decided to take videos lol.  So I just picked anyway so you could see what I was doing. In this clip you can get a really good view of the V of the frog. ​
Picture
2 Comments

How To: Pull a Mane

9/6/2016

0 Comments

 
Picture
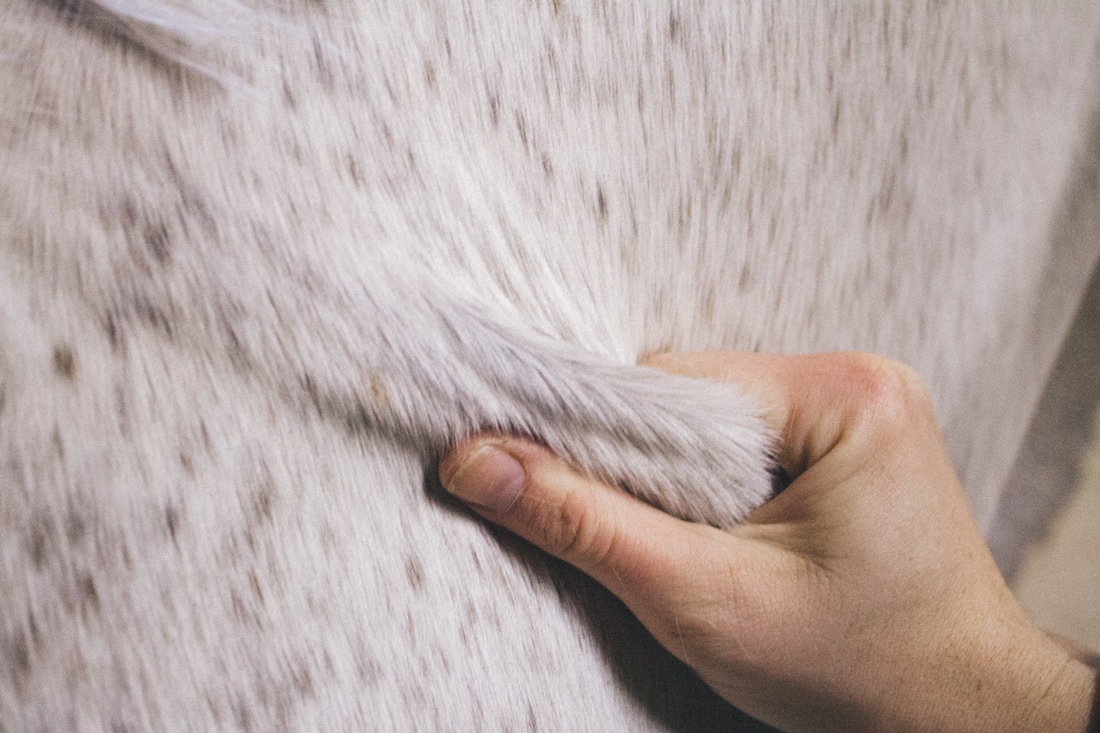
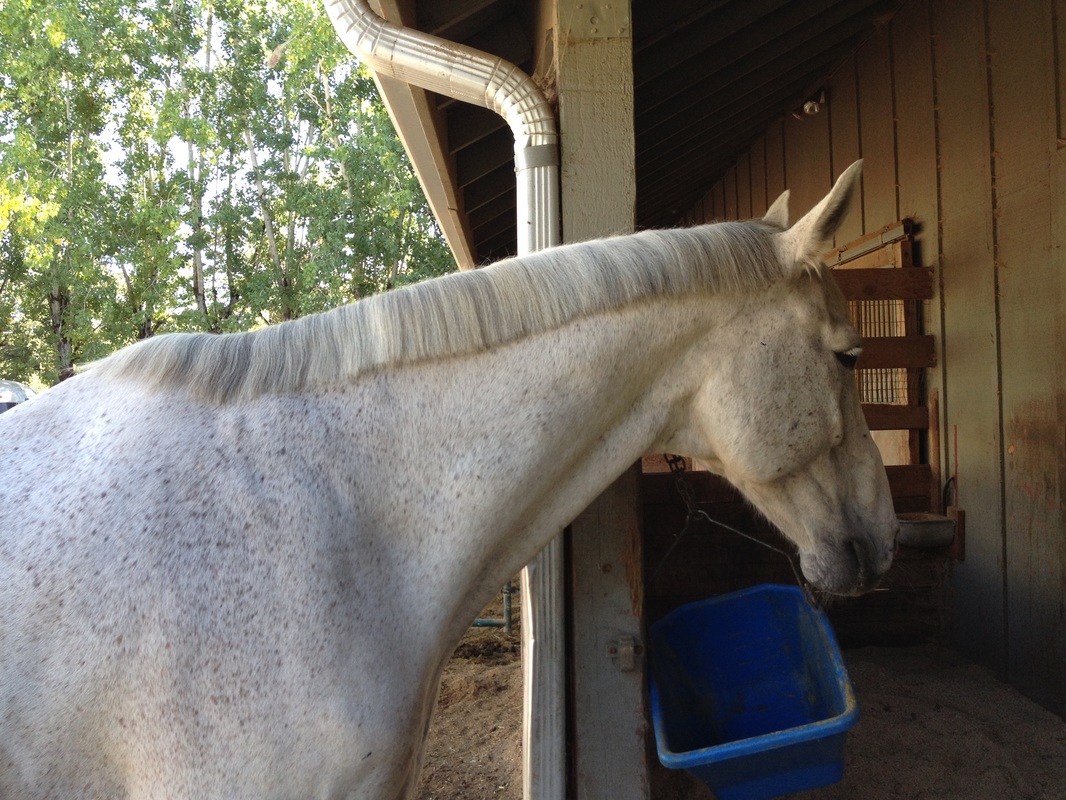
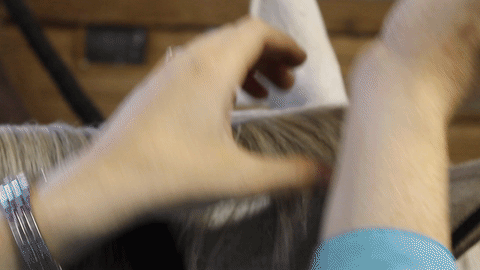
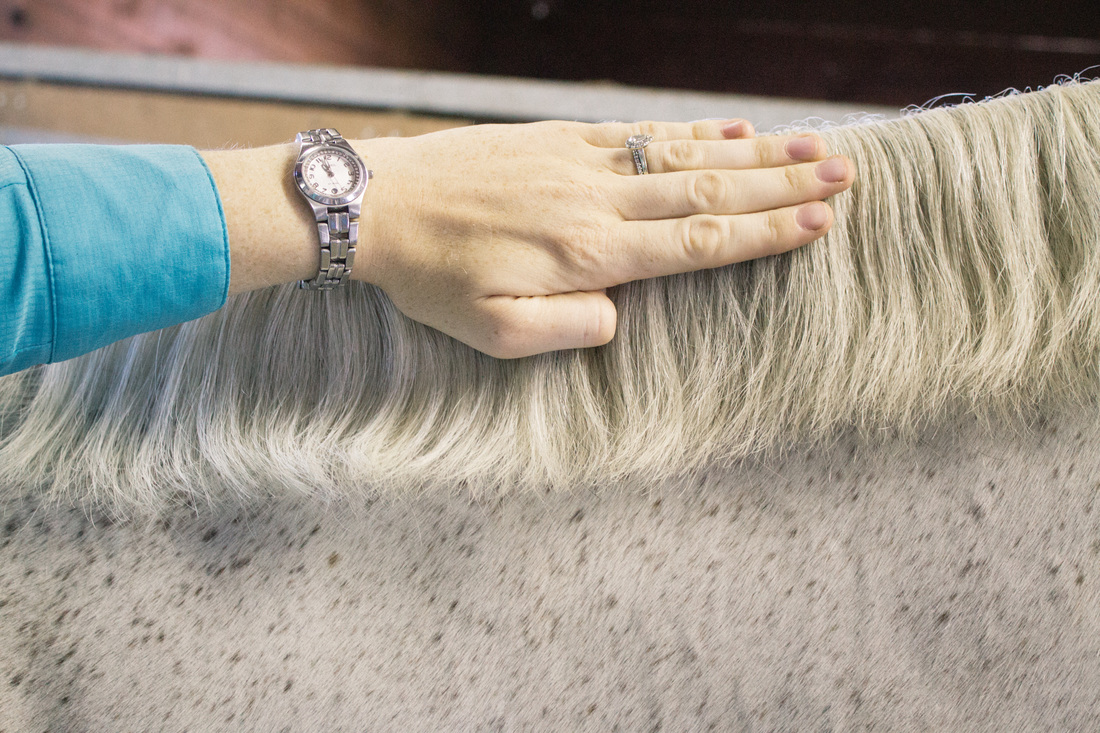
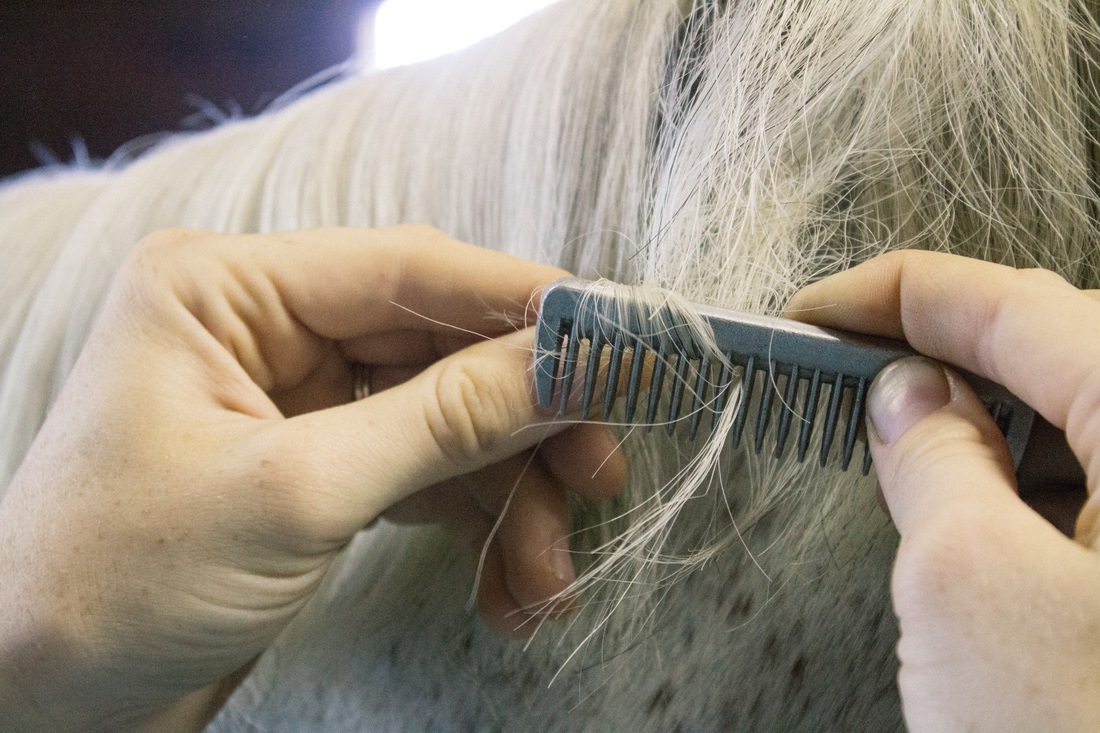
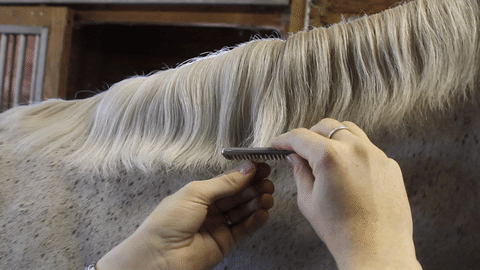
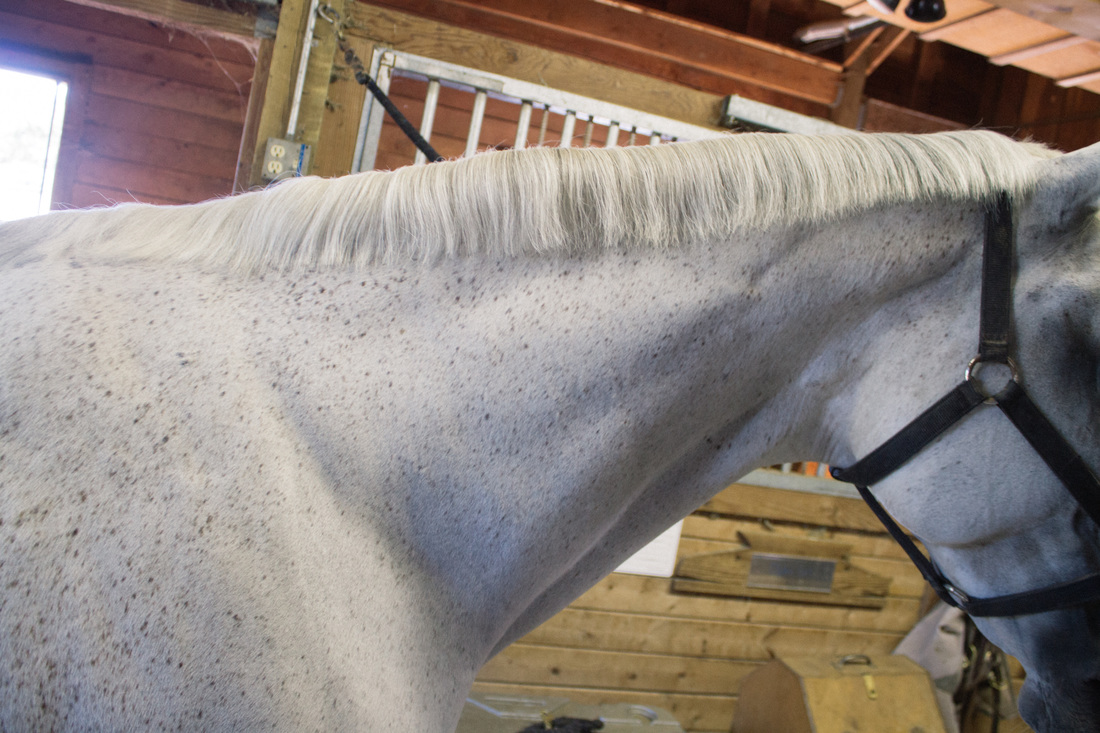
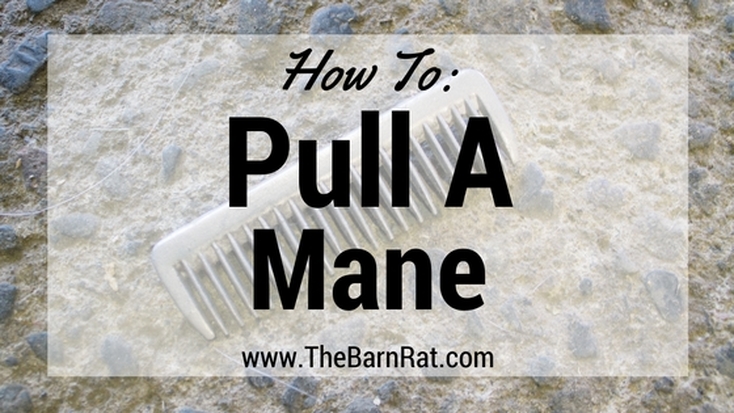
   One of the ways to keep your horse looking fancy and taken care of, at least for us hunter/jumper people, is to have a well kept mane. Allowing a mane to grow too long really makes your horse look messy. There are two ways to maintain a mane, this post will go over how to pull the mane and in a later post I will outline how to trim a mane with scissors.

   It is best to learn how to pull a mane first because this is the most traditional way and the expected way if someone where to ever ask you to take care of a mane. Pulling a mane is in fact pulling the mane hair out of the mane. Now that sounds like the most traumatic thing to do to your horse. However! Horses don't have nerve endings in their mane area, so pulling out the hair causes them no pain.

Step #1: Measure

   Depending on what you plan on doing with your horse and the need for making their mane shorter, there are two different lengths that are normal. The width of your four fingers is about the length you want the mane if you plan on going to a horse show where your horse will be braided. Shorter hair makes braiding easier. If you are just trying to keep your horse looking tidy I will include my thumb in the measurement. This gives the mane a little bit more weight and length so it doesn't mohawk and continues to lay flat on the horse's neck.
Picture

Picture

Step #2: Back Comb

   First make sure you are using a metal pulling comb, a plastic one will end up breaking and a comb with a razor will be cutting the mane at the same time and is not desired.

   Start by grabbing a section of hair at it's longest point and then use your metal pulling comb to push the shorter hair away from where you are holding. By backcombing the mane you are keeping the majority of the hair and only pulling out the longest pieces. This helps to thin the mane while making it shorter.

Step #3: Wrap Around

   Once you have backcombed the section of hair you are holding, you then take what is left in your hand and wrap it around your pulling comb. By wrapping the hair around the comb you give yourself the needed leverage to pull the hair out of the horse's mane.
Picture

Picture

Step #4: Pull

   Once you've wrapped the hair around the comb all that is left for you to do is pull the hair out. Make sure you do small-ish sections at a time to avoid pulling really hard on the horse's neck with a big chunk of hair. Again, horse's don't have nerve endings in their mane so they don't feel pain when you pull the hair out, but be fair and don't try and pull out too large of a section.
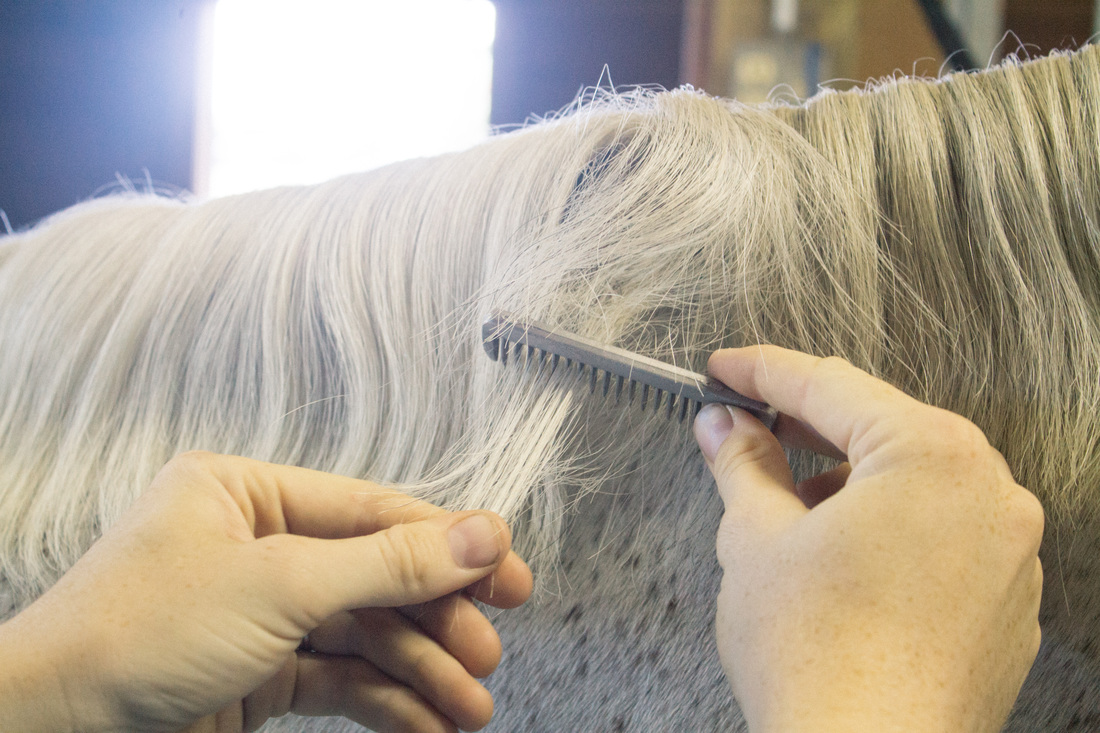
   Many horses, if they don't regularly get their manes pulled, will react to you doing this step. They are reacting to the pressure that pulls their neck to one side (you can see a small amount of movement in the video on the side) and not pain. If you are pulling a horse's mane for the first time go slow! Take breaks as the horse needs them and break it up into multiple days. As long as you stay calm and patient you will train a horse that calmly stands for getting their mane pulled without any fuss.

The Final Product

   Keep repeating these steps until you have done the whole mane, from poll to wither. Make sure you take steps back often to make sure you are staying even and straight. If it is your first time pulling a mane, stay on the safe side and leave the mane a little long. You can always make it shorter, it takes a while for the mane to grow back and cover up mistakes.
Picture
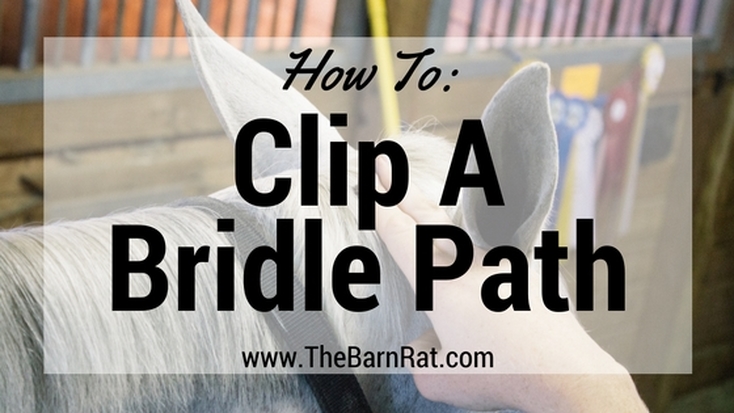
   Also, start at the poll. So start right behind the horse's ears. The reason for doing this is because many horses don't really like you messing around either with their ears of just being up by their head like that. So, if you start there first they will appreciate it getting over with quickly. If you wait to do up by their ears until the end, after you have already spent time pulling the rest of their mane your horse will most likely have lost their patience with the process and be less willing to stand still for you.

   When you are finished you should have a nice straight, thin mane that helps make your horse look super polished.
0 Comments

How To: Use a Soft Brush

6/2/2016

0 Comments

 
Picture
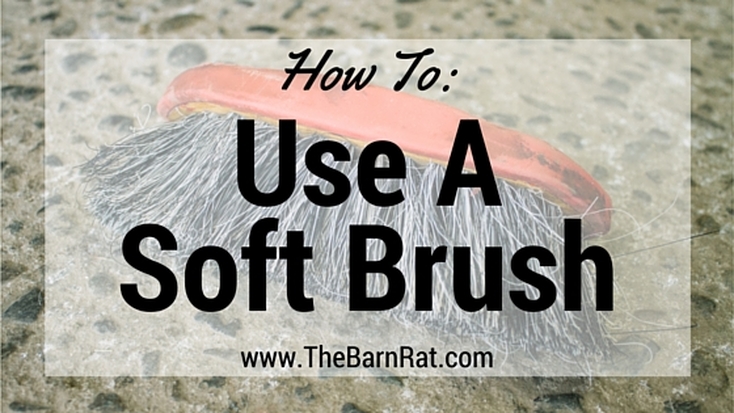
   Another tool in the Essential Grooming Box is the soft brush. The soft brush is for the finishing details and for the more sensitive areas of the horse. After using the curry comb and the hard brush you can go over the whole body again and remove any lingering small dust particles. Sensitive areas would include the horse's face and the legs.

Brushing the Face

   First, hold the halter with your non-brushing hand. This controls the horse from lifting their head away from your brush. Short strokes lift away the dirt the best. Be careful around the eyes, you do not want to brush dirt into the eye or accidentally poke the eye with the brush's bristles. 
Picture

Picture

Brushing the Legs

   The legs are very sensitive because the skin directly covers many tendons and ligaments so using a hard brush could cause irritation. Again, use short brush strokes. Start from the shoulder and work all the way down to the hoof.
0 Comments

How To: Use a Hard Brush

5/16/2016

0 Comments

 
Picture
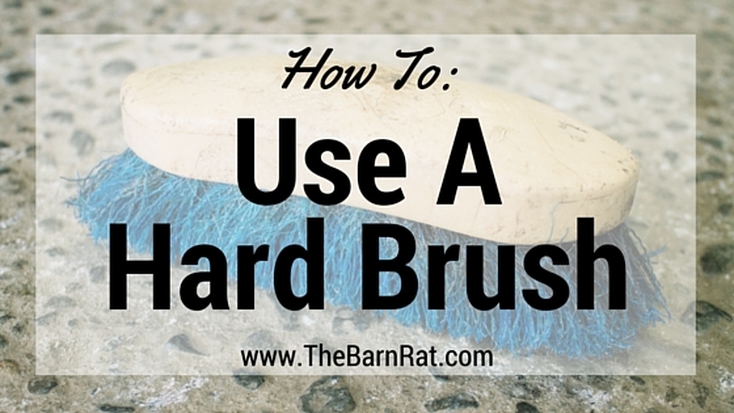
   The hard brush is another item from The Essential Grooming Box. It should have long course bristles. Use the hard brush after currying your horse's body. Brush the neck and body with short strokes. This helps remove excess hair and dirt from the horse. Be gentile with this brush, since the bristles are firm you can irritate sensitive areas if used too firmly (ie. the back and flank). Do not use on the face or legs.
Picture
0 Comments

How To: Use a Curry Comb

5/9/2016

0 Comments

 
Picture
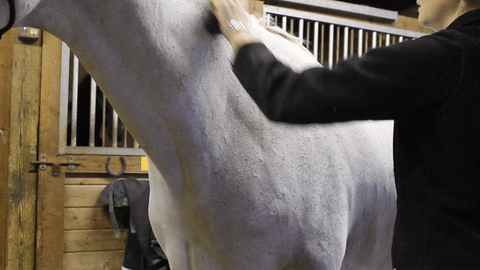
   As mentioned in the previous post, The Essential Grooming Box, the curry comb is usually made of rubber or plastic with bumps or nobs covering the useable surface. The curry comb is best used as the first tool when grooming your horse. It lifts dirt and hair away from a horse's skin to be easily brushed away later. Currying also stimulates a horse's circulatory system and is a way to bond with your horse. Use the curry in a circular motion all over the neck and body. Do not use on a horse's face or legs, those areas are very sensitive.
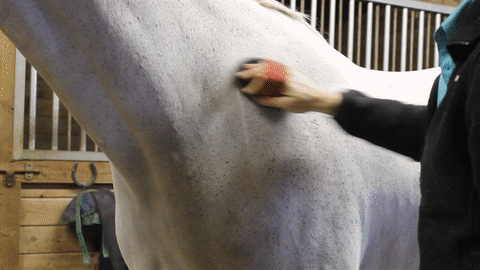
Picture
0 Comments
<<Previous
    Picture

    Instagram


    Categories

    All
    About
    Anatomy
    Barn Tours
    Book Club
    Book Review
    Career Panel
    Clipping
    College
    Equipment
    Etiquette
    Grooming
    How To
    Interviews
    Product Review
    Riding
    Road To RRP 2019
    Show Ready
    Transformations
    Videos


    Picture
    * indicates required

    Sponsors

    Cantera Equestrian
    Cantera Equestrian

    Picture
    Trafalgar Square Books
    Interested in sponsoring The Barn Rat? Be sure to contact us here!
© COPYRIGHT 2022. ALL RIGHTS RESERVED.